
Most post-production problems aren't creative problems, they're process problems. A scattered video editing workflow leads to missed cuts, bloated timelines, and hours wasted hunting for the right file or re-doing work that should've been locked two revisions ago. Whether you're editing short-form content for social or long-form brand pieces, the difference between amateur and professional output almost always comes down to how the work is organized, not how talented the editor is.
At SocialRevver, editing is a core stage in our managed content system. Our AI-supported editing pipeline handles cut optimization, motion pacing, sound design, captions, and branded visuals for every piece of short-form content we produce. That system didn't appear overnight, it was built by pressure-testing hundreds of thousands of production cycles and stripping out every inefficiency we could find.
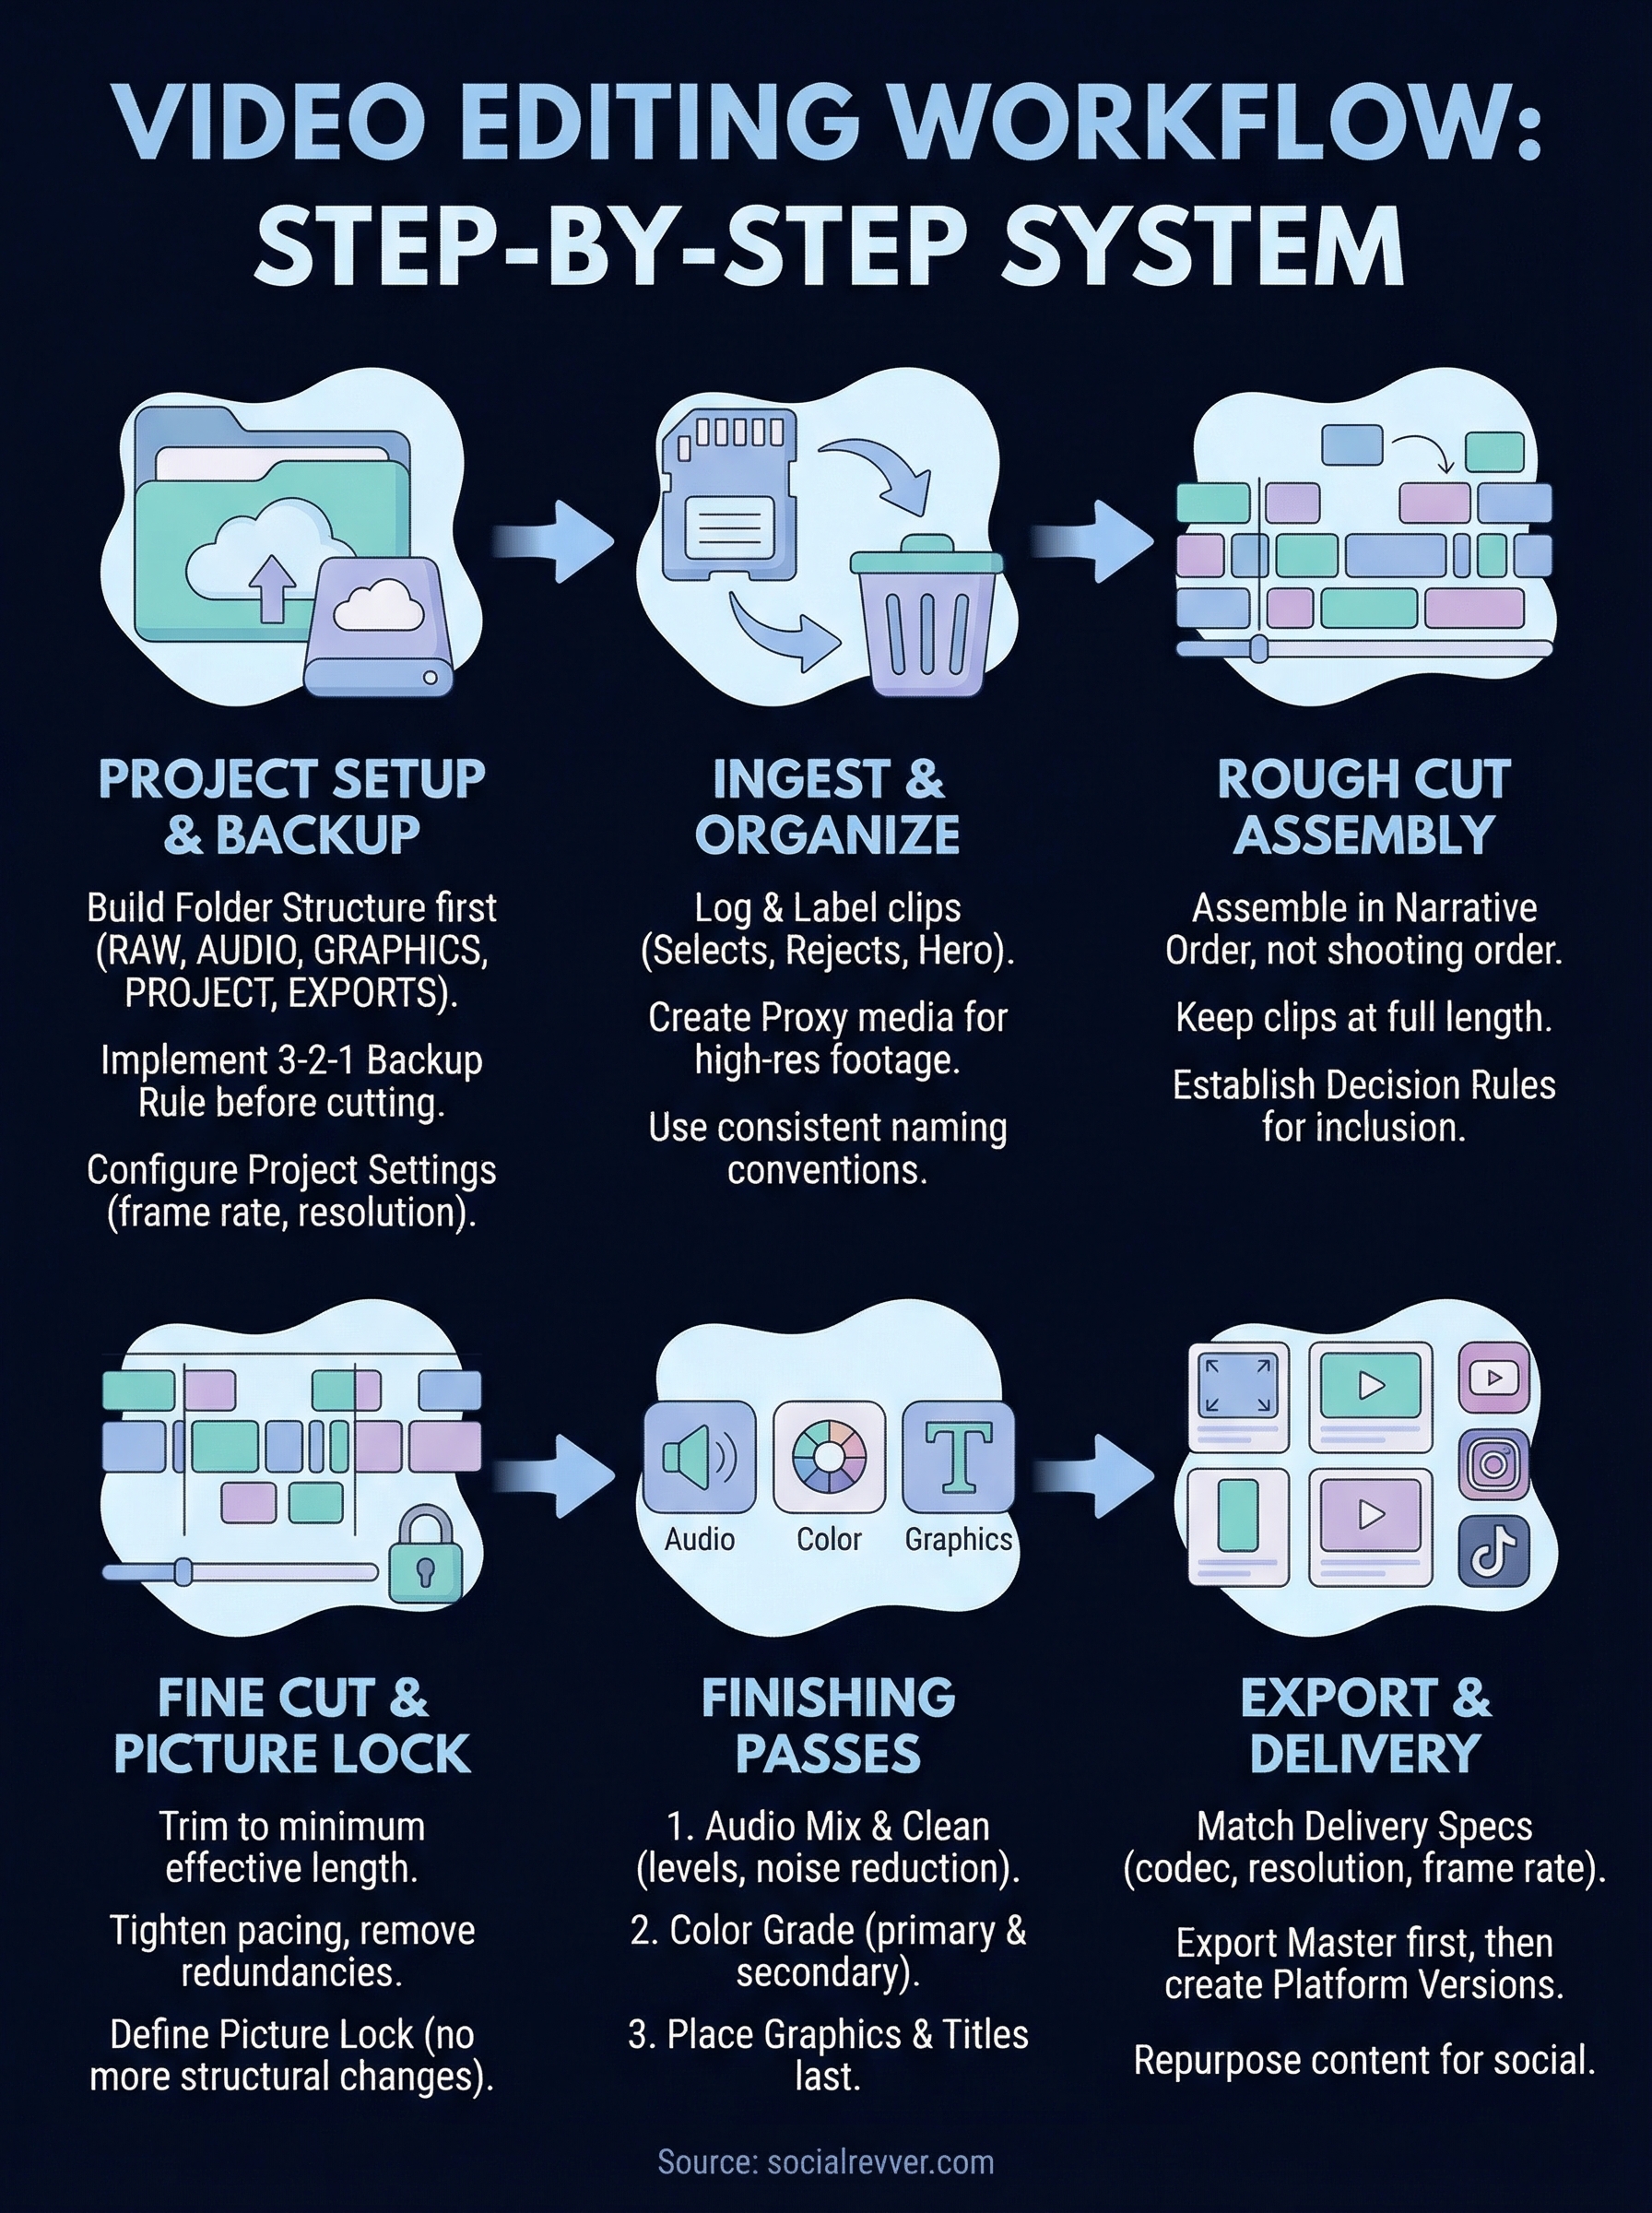
This guide breaks down the complete post-production process into a repeatable, step-by-step system. You'll learn how to structure your workflow from ingest to final export, eliminate the bottlenecks that slow you down, and build a process that produces consistent, professional results, whether you're a solo editor or managing a full production team.
What a video editing workflow includes
A video editing workflow is the structured sequence of stages that moves your raw footage from an intake drive to a polished, deliverable file. Most editors treat this as a loose task list they work through by feel, but that approach breaks down fast when the project scales, a client changes direction, or a second editor steps into the timeline. The stronger approach is to treat your workflow as a system of repeatable decisions you establish before the edit starts, so you're never resolving structural problems at the same time you're making creative ones.
A workflow doesn't just tell you what to do next. It preserves what you decided earlier so you don't have to decide it again under pressure.
The core stages of post-production
Every video edit, regardless of length or format, moves through the same fundamental stages. Understanding what each stage covers and where it sits in the sequence keeps your timeline clean and your delivery predictable. The table below maps each stage to its primary function.
| Stage | What Happens |
|---|---|
| Project Setup | Folder structure, file naming, settings, and backup system |
| Ingest and Organization | Logging, labeling, and binning your footage |
| Rough Cut | Assembling the story without polish |
| Fine Cut | Tightening pacing and locking picture |
| Audio, Color, and Graphics | Finishing passes for sound, grade, and titles |
| Export and Delivery | Final render, format specs, and versioning |
Each stage builds directly on the one before it. Skipping or compressing a stage to save time almost always costs you more time later, typically in the form of rework, version confusion, or a final export that doesn't meet spec.
What separates a workflow from a checklist
A checklist tells you what to do. A workflow tells you why a task happens at a specific point in the process and what depends on it being done correctly. The difference matters because post-production is non-linear in practice even when it looks linear on paper. Decisions made in the rough cut affect how you approach audio. A picture lock that isn't actually locked creates cascading problems when you hand the timeline to a colorist.
Building your workflow around dependencies, not just individual tasks, is what gives you the control to catch those conflicts early. A practical habit that reinforces this: before you move from one stage to the next, identify what the next stage requires from the current one, and confirm you've actually delivered it. That one check removes most of the rework that kills production schedules.
The non-negotiables that apply to every format
Whether you're cutting a 60-second social clip or a 20-minute brand documentary, three elements must be present in any functional editing system. First, your files need a consistent naming and folder convention locked in from day one, not retroactively. Second, every version of the project needs to be backed up in at least two separate locations before you advance to the next stage. Third, each stage needs a defined completion condition, a specific, objective signal that you're done with that phase and ready to move forward, not just done enough for now.
Step 1. Set up the project and back it up
Before you touch a single clip, your folder structure and backup system need to be in place. Skipping this stage corrupts your entire video editing workflow because files end up in inconsistent locations, you import the wrong asset version mid-edit, and you end up rebuilding basic organization under deadline pressure. The setup takes ten minutes. Recovering from skipping it takes hours.
Build your folder structure before you import anything
Your folder architecture should mirror the stages of production, not just dump everything into one directory. Create all your folders first, then import footage into the correct location from the start. A clear structure means any editor can open the project and navigate it without asking you for context.
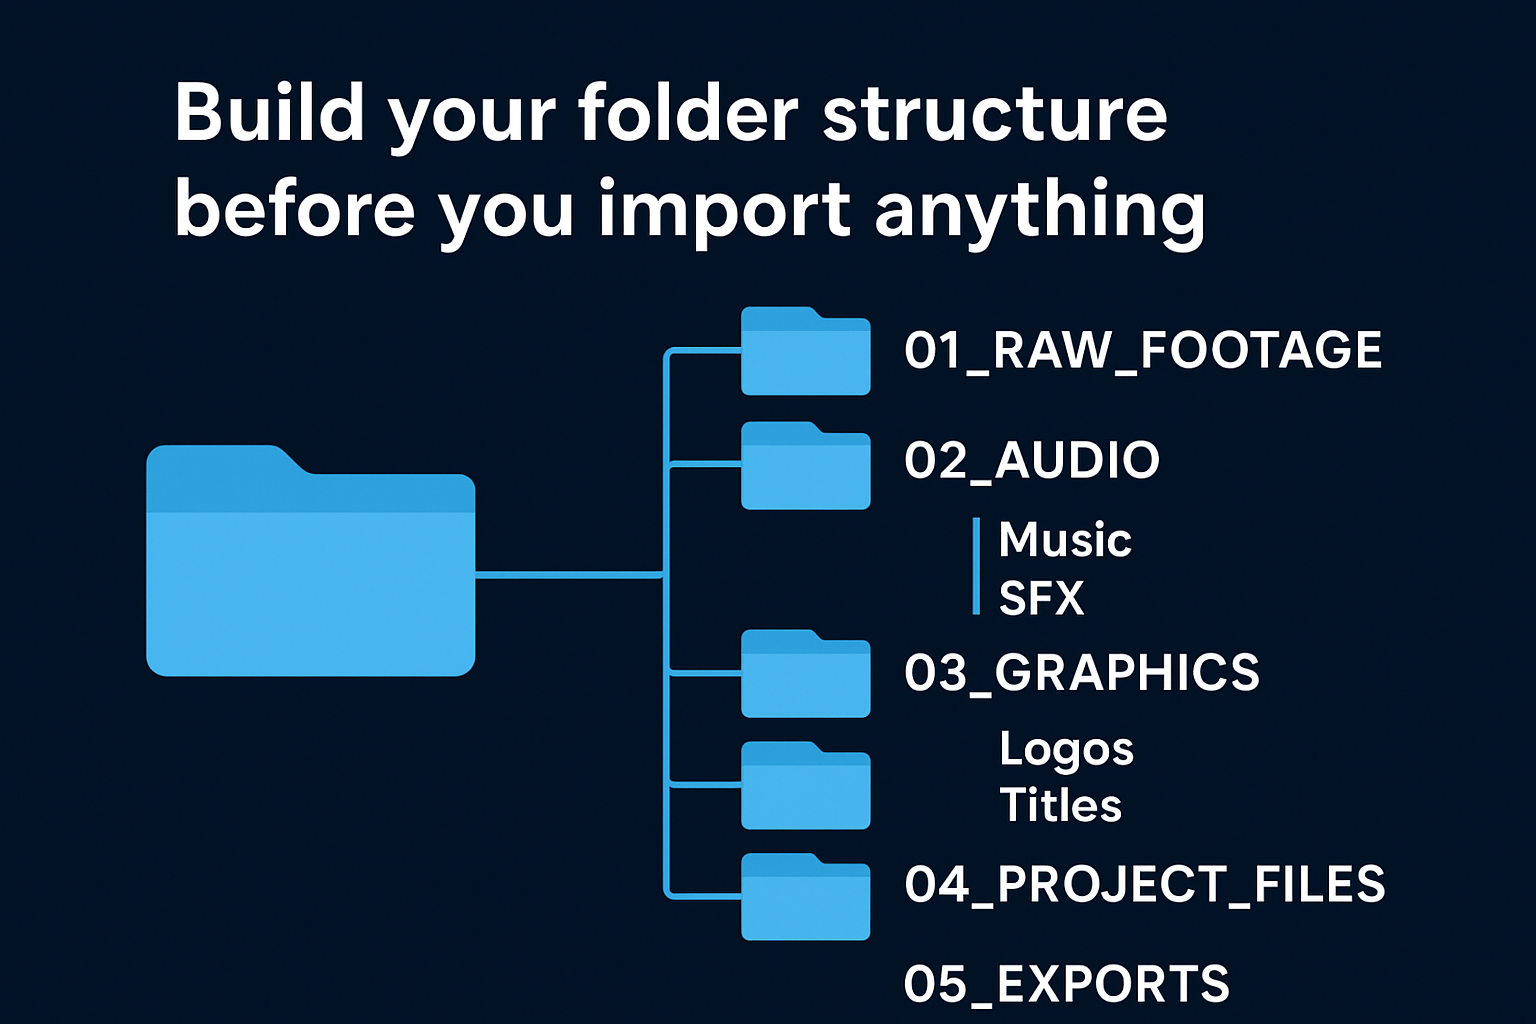
Below is a folder template you can adapt for any project type:
Project_Name/
├── 01_RAW_FOOTAGE/
├── 02_AUDIO/
│   ├── Music/
│   └── SFX/
├── 03_GRAPHICS/
│   ├── Logos/
│   └── Titles/
├── 04_PROJECT_FILES/
├── 05_EXPORTS/
│   ├── Final/
│   └── Versions/
└── 06_DOCUMENTS/
    ├── Brief/
    └── Notes/
Number each top-level folder with a numeric prefix so your file system sorts them in production order automatically. Use underscores instead of spaces to prevent path errors in export pipelines and automation tools.
Back up before you start cutting
A backup only protects you if it exists before something fails, not after the fact. Set up your backup structure as the very first action you take when a new project folder is created.
The correct time to configure your backup is when the project folder is empty, not when the timeline is full.
Your minimum backup standard should follow the 3-2-1 rule: three copies of your files, stored on two different media types, with one copy kept off-site or in cloud storage. Apply this before you open your editing application for the first time on any project:
- Local drive: Primary working copy on your editing machine
- External SSD: Second copy updated after every session
- Cloud storage: Automated sync running in the background
Finally, configure your project settings before you build a single sequence. Frame rate, resolution, color space, and sequence preset all need to match your delivery specifications from day one. Changing these settings mid-project causes render mismatches and forces you to re-conform work you've already completed.
Step 2. Ingest and organize footage fast
Ingest is the stage where your raw footage moves from camera cards or field drives into your organized project structure. Most editors rush through this because it feels administrative, but disorganized footage is the single most common reason a video editing workflow slows to a crawl mid-project. Spending the time to do this correctly now means every stage that follows moves faster and with fewer interruptions.
Log and label your clips before you edit anything
Before you drop a single clip into a timeline, review your footage and assign labels or markers that will make the edit faster. You don't need to watch every second, but you do need to know what you have. Go through each bin and mark your selects (the clips you'll likely use) and your rejects (clips you know you won't use) so your timeline doesn't fill up with unusable material from the start.
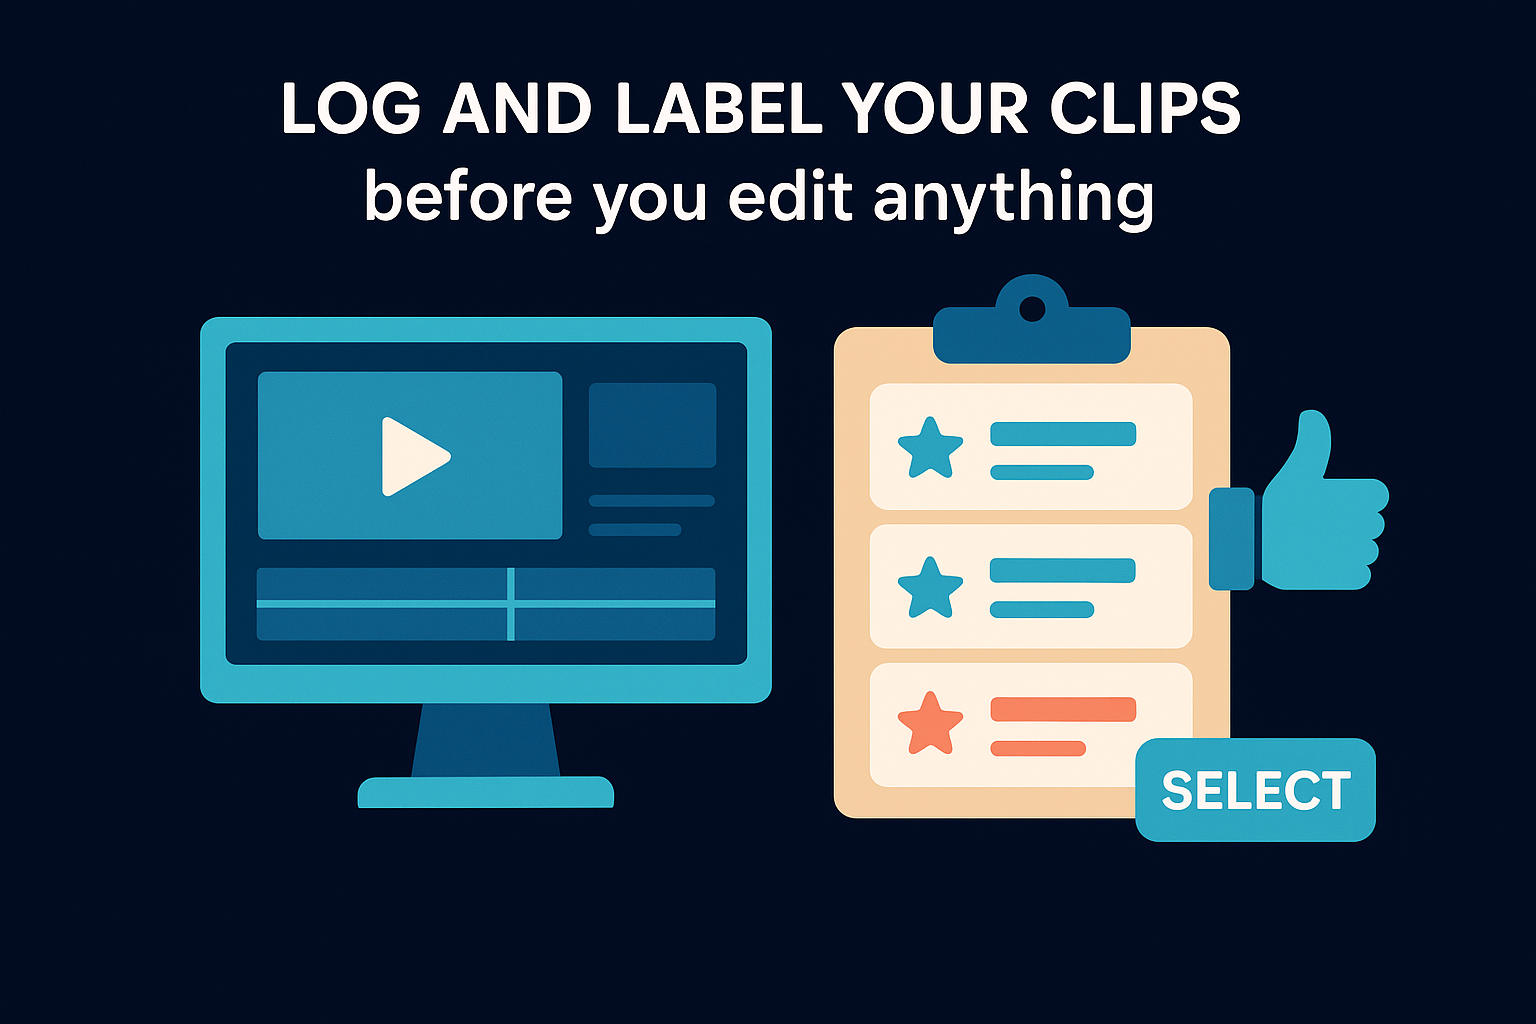
The five minutes you spend logging footage saves twenty minutes of hunting through a timeline looking for the right take.
Use a consistent labeling system across every project. Here's a simple rating template you can apply in most editing applications:
| Rating | Label | Meaning |
|---|---|---|
| 5 stars | Select | Best take, use first |
| 3 stars | Maybe | Usable if selects fall short |
| 1 star | Reject | Do not pull into timeline |
| Color: Red | Problem | Technical issue (focus, audio dropout) |
| Color: Green | Hero | Best clip in the entire project |
Apply these ratings before you create your first sequence. Changing or re-evaluating clips mid-edit adds friction and pulls your attention away from creative decisions.
Create proxy media for high-resolution footage
4K and higher resolution footage will bog down most editing machines if you cut with native files, particularly on projects with large clip counts. Create proxy media immediately after ingest: lower-resolution versions of your clips that link back to the high-resolution originals at export time. In most professional editing applications, this is a one-click process that runs in the background while you continue organizing.
Keeping proxies inside your project folder prevents broken links if the project moves between machines. Store them at a path like 04_PROJECT_FILES/Proxies/ and confirm your proxy format matches the frame rate of your delivery sequence before you start the transcode. A mismatch here causes sync drift that's painful to catch and fix after the edit is built.
Step 3. Build a rough cut that tells the story
The rough cut is where your video editing workflow moves from organization into storytelling. Your goal at this stage is not a polished edit; it's a complete structural draft that sequences your selects into a narrative that holds together from start to finish. Resist the urge to polish individual cuts here. Every minute you spend fine-tuning a transition in the rough cut is a minute wasted if that section gets restructured in the next pass.
Assemble in story order, not shooting order
Pull your selects into a new sequence and arrange them in narrative order, not the order they were shot. Footage almost never arrives in the sequence the story needs it. Your job in this pass is to find the logic of the edit, the arrangement that makes the content clear and compelling to someone watching it cold for the first time.
The rough cut should answer one question: does the story make sense if you watch it straight through without stopping?
Keep every clip at its full, uncut length during the first assembly pass. This gives you flexibility when you start trimming in the fine cut and prevents you from discarding options you'll want later. Use in-timeline markers to flag moments where pacing feels slow or a transition isn't working, but do not fix them yet. Fixing is the next stage's job.
Set your decision rules before you start trimming
Before you make a single trim in the rough cut, define the criteria you'll use to evaluate whether a moment earns its place in the edit. Without those criteria, you'll trim based on instinct alone, which produces inconsistent pacing and cuts that feel right in isolation but fail the full piece.
A simple decision framework keeps you consistent across every clip in the assembly:
| Question | If Yes | If No |
|---|---|---|
| Does this clip advance the story? | Keep it | Mark for removal |
| Does this moment repeat information already shown? | Cut it | Keep it |
| Does the clip have a clean in-point and out-point? | Use it | Flag for replacement |
| Is this the strongest available take? | Lock it in | Compare against alternatives |
Apply this table clip by clip during your first review pass. It converts a subjective creative process into a repeatable, auditable decision system you can stand behind in client reviews and hand off to another editor without losing context.
Step 4. Create a tight fine cut and lock picture
The fine cut is where you convert your rough assembly into a tight, properly paced edit you can stand behind. Your goal here is to trim every clip to its minimum effective length without losing the content's clarity or momentum. This is the most time-intensive pass in the video editing workflow, but it's also where the quality gap between an amateur and professional edit becomes most visible.
Trim every clip to its load-bearing minimum
Work through the timeline clip by clip and remove everything that doesn't carry weight. Dead air at the head or tail of a clip, overlapping information, and weak transitions all compound into a sluggish final product. A reliable rule: if removing a moment doesn't break the story, remove it.
If you're unsure whether a clip earns its place, play the sequence without it. If the edit still holds together, cut it.
Use the following criteria to evaluate each clip during the fine cut pass:
| Edit Decision | Action |
|---|---|
| Clip starts with hesitation or dead air | Trim the in-point |
| Clip ends after the main point is made | Trim the out-point |
| Two consecutive clips repeat the same information | Remove the weaker one |
| Transition feels abrupt | Check adjacent clips before adding effects |
| Pacing drags for more than three seconds | Cut or reorder |
Apply this table sequentially, not simultaneously. Trying to fix pacing and content redundancy at the same time splits your attention and leads to over-cutting.
Define what picture lock means on your project
Picture lock is the point where the edit is structurally final. No more clip additions, removals, or timing changes happen after this point. This matters because every downstream stage, audio mixing, color grading, and graphics placement, is built on top of a stable timeline. Reopening the cut after picture lock forces those stages to redo completed work against a moving target, which compounds delays across the rest of your schedule.
Before you mark the timeline locked, confirm each of these conditions is met:
- All selects are in their final position
- Client or stakeholder approval is documented in writing
- No placeholder clips remain in the sequence
- Total runtime matches the delivery specification you established at project setup
Step 5. Finish audio, color, and graphics
With your picture locked, three finishing passes transform your edit from a functional assembly into a polished, deliverable piece. Audio, color, and graphics each require a dedicated pass completed in that specific order. Running them in sequence, not simultaneously, keeps your decision-making focused and prevents changes in one area from creating conflicts in another part of the timeline.
Mix and clean your audio first
Audio problems destroy otherwise strong edits faster than any visual issue. Before you touch your color grade or place a single title, sweep the entire timeline for audio inconsistencies: volume spikes, background noise, dialogue-level mismatches, and gaps in room tone between clips. Fix all of these in a single, dedicated audio pass so your finishing work stays compartmentalized and reversible.
Viewers will tolerate imperfect visuals far longer than they'll tolerate bad audio. Fix sound first, every time.
Use the following reference levels as your baseline for web and social delivery:
| Audio Element | Target Level |
|---|---|
| Dialogue / voiceover | -12 dBFS to -6 dBFS |
| Background music | -24 dBFS to -18 dBFS |
| Sound effects | -18 dBFS to -12 dBFS |
| Peak ceiling (master) | -1 dBFS |
After leveling, apply noise reduction to any clip with ambient hum or room noise, then run a final integrated loudness check against your platform's delivery specification before advancing to color.
Grade your color and place graphics last
Color grading shapes how your audience reads the emotional tone and credibility of your content, so it belongs after audio is locked and before any graphics are placed. Start with a primary correction pass: fix exposure, white balance, and contrast across every clip before you apply any stylistic look. Once your primaries are consistent across the full timeline, add your secondary grade to shape mood and visual identity.

Place graphics, titles, and lower thirds in the final pass of your video editing workflow, after the color grade is complete. Adding text and logos before grading means those elements can shift visually when you apply a LUT or an adjustment layer over the top. Build a reusable graphics template that stores your brand fonts, colors, and logo placement rules so you apply consistent visual identity across every project without rebuilding assets from scratch each time. Store the template inside your 03_GRAPHICS/ folder at project setup so it's available the moment this stage begins.
Step 6. Export, deliver, and repurpose versions
Export is the final stage of your video editing workflow, and it's where technical errors have the most visible consequences. The wrong codec, mismatched frame rate, or incorrect aspect ratio means your content fails before your audience ever sees it. Treat this stage with the same deliberate attention you gave every stage before it.
Configure your export settings to match delivery specs
Before you render anything, confirm your export settings against the delivery specification you defined at project setup. Every platform has different technical requirements, and using a one-size-fits-all preset introduces avoidable quality loss or upload rejection. Pull up the spec sheet for each destination and match your settings precisely.
Exporting without checking platform specs first is the fastest way to lose quality you spent hours building into the edit.
Use this template as your pre-export checklist for the most common delivery destinations:
| Platform | Resolution | Frame Rate | Format | Codec | Max File Size |
|---|---|---|---|---|---|
| YouTube | 1920x1080 | Match source | MP4 | H.264 / H.265 | 256 GB |
| Instagram Reels | 1080x1920 | 30fps | MP4 | H.264 | 4 GB |
| LinkedIn Video | 1920x1080 | 30fps | MP4 | H.264 | 5 GB |
| TikTok | 1080x1920 | 30fps | MP4 | H.264 | 4 GB |
| Client Master | Match source | Match source | ProRes 422 | ProRes | No limit |
Always export your master file first at the highest available quality, typically ProRes 422 or a lossless format, then derive all platform versions from that master. Never compress from a previously compressed source file, because each generation of lossy compression removes detail you cannot recover.
Build a repurpose system for every format your platform needs
Your finished long-form piece contains multiple short-form assets that can be extracted and distributed independently. A single 10-minute brand video often contains three to five standalone clips that work as Reels, Shorts, or TikToks with minimal additional editing. Building a repurpose pass into your system multiplies the output from a single production investment.
After your master export is complete, identify moments from the timeline that can stand alone: a strong opening hook, a key insight, a compelling visual sequence. Re-export each clip with the correct aspect ratio and duration for its target platform. Store all versions inside 05_EXPORTS/Versions/ with clear naming that includes the platform name, resolution, and date so nothing gets overwritten or confused across delivery rounds.
Wrap-up and next steps
The six-step system in this guide gives you a complete video editing workflow you can apply to your next project immediately. From folder setup and footage ingest through picture lock, finishing passes, and final export, every stage now has a clear entry condition, a defined output, and a completion check that keeps your production on track without rework.
Building this system once pays you back on every project that follows. Your timelines stay cleaner, delivery windows shrink, and your output becomes predictable enough to scale whether you're running one project or ten simultaneously. The initial investment is roughly thirty minutes of setup, and every project after that runs faster because of it.
If you want a content production system that already has scripting, editing, distribution, and performance optimization built in and running for your brand, apply to work with the SocialRevver team and get a free 40-slide social media strategy built around your specific goals.