
A great Reel starts with a great edit. But knowing how to edit videos for Instagram Reels isn't just about slapping clips together and adding a trending sound. It's about pacing, hooks, visual rhythm, and structure, the things that determine whether someone stops scrolling or keeps going. The difference between a Reel that lands and one that flops almost always comes down to what happens in the edit.
At SocialRevver, we've built an entire production system around short-form video, analyzing over 750,000 videos to understand what makes edits perform. That research consistently shows the same thing: creators and business owners who treat editing as a skill, not an afterthought, see dramatically better results. The good news? You don't need a film degree or a $5,000 software suite to make it happen.
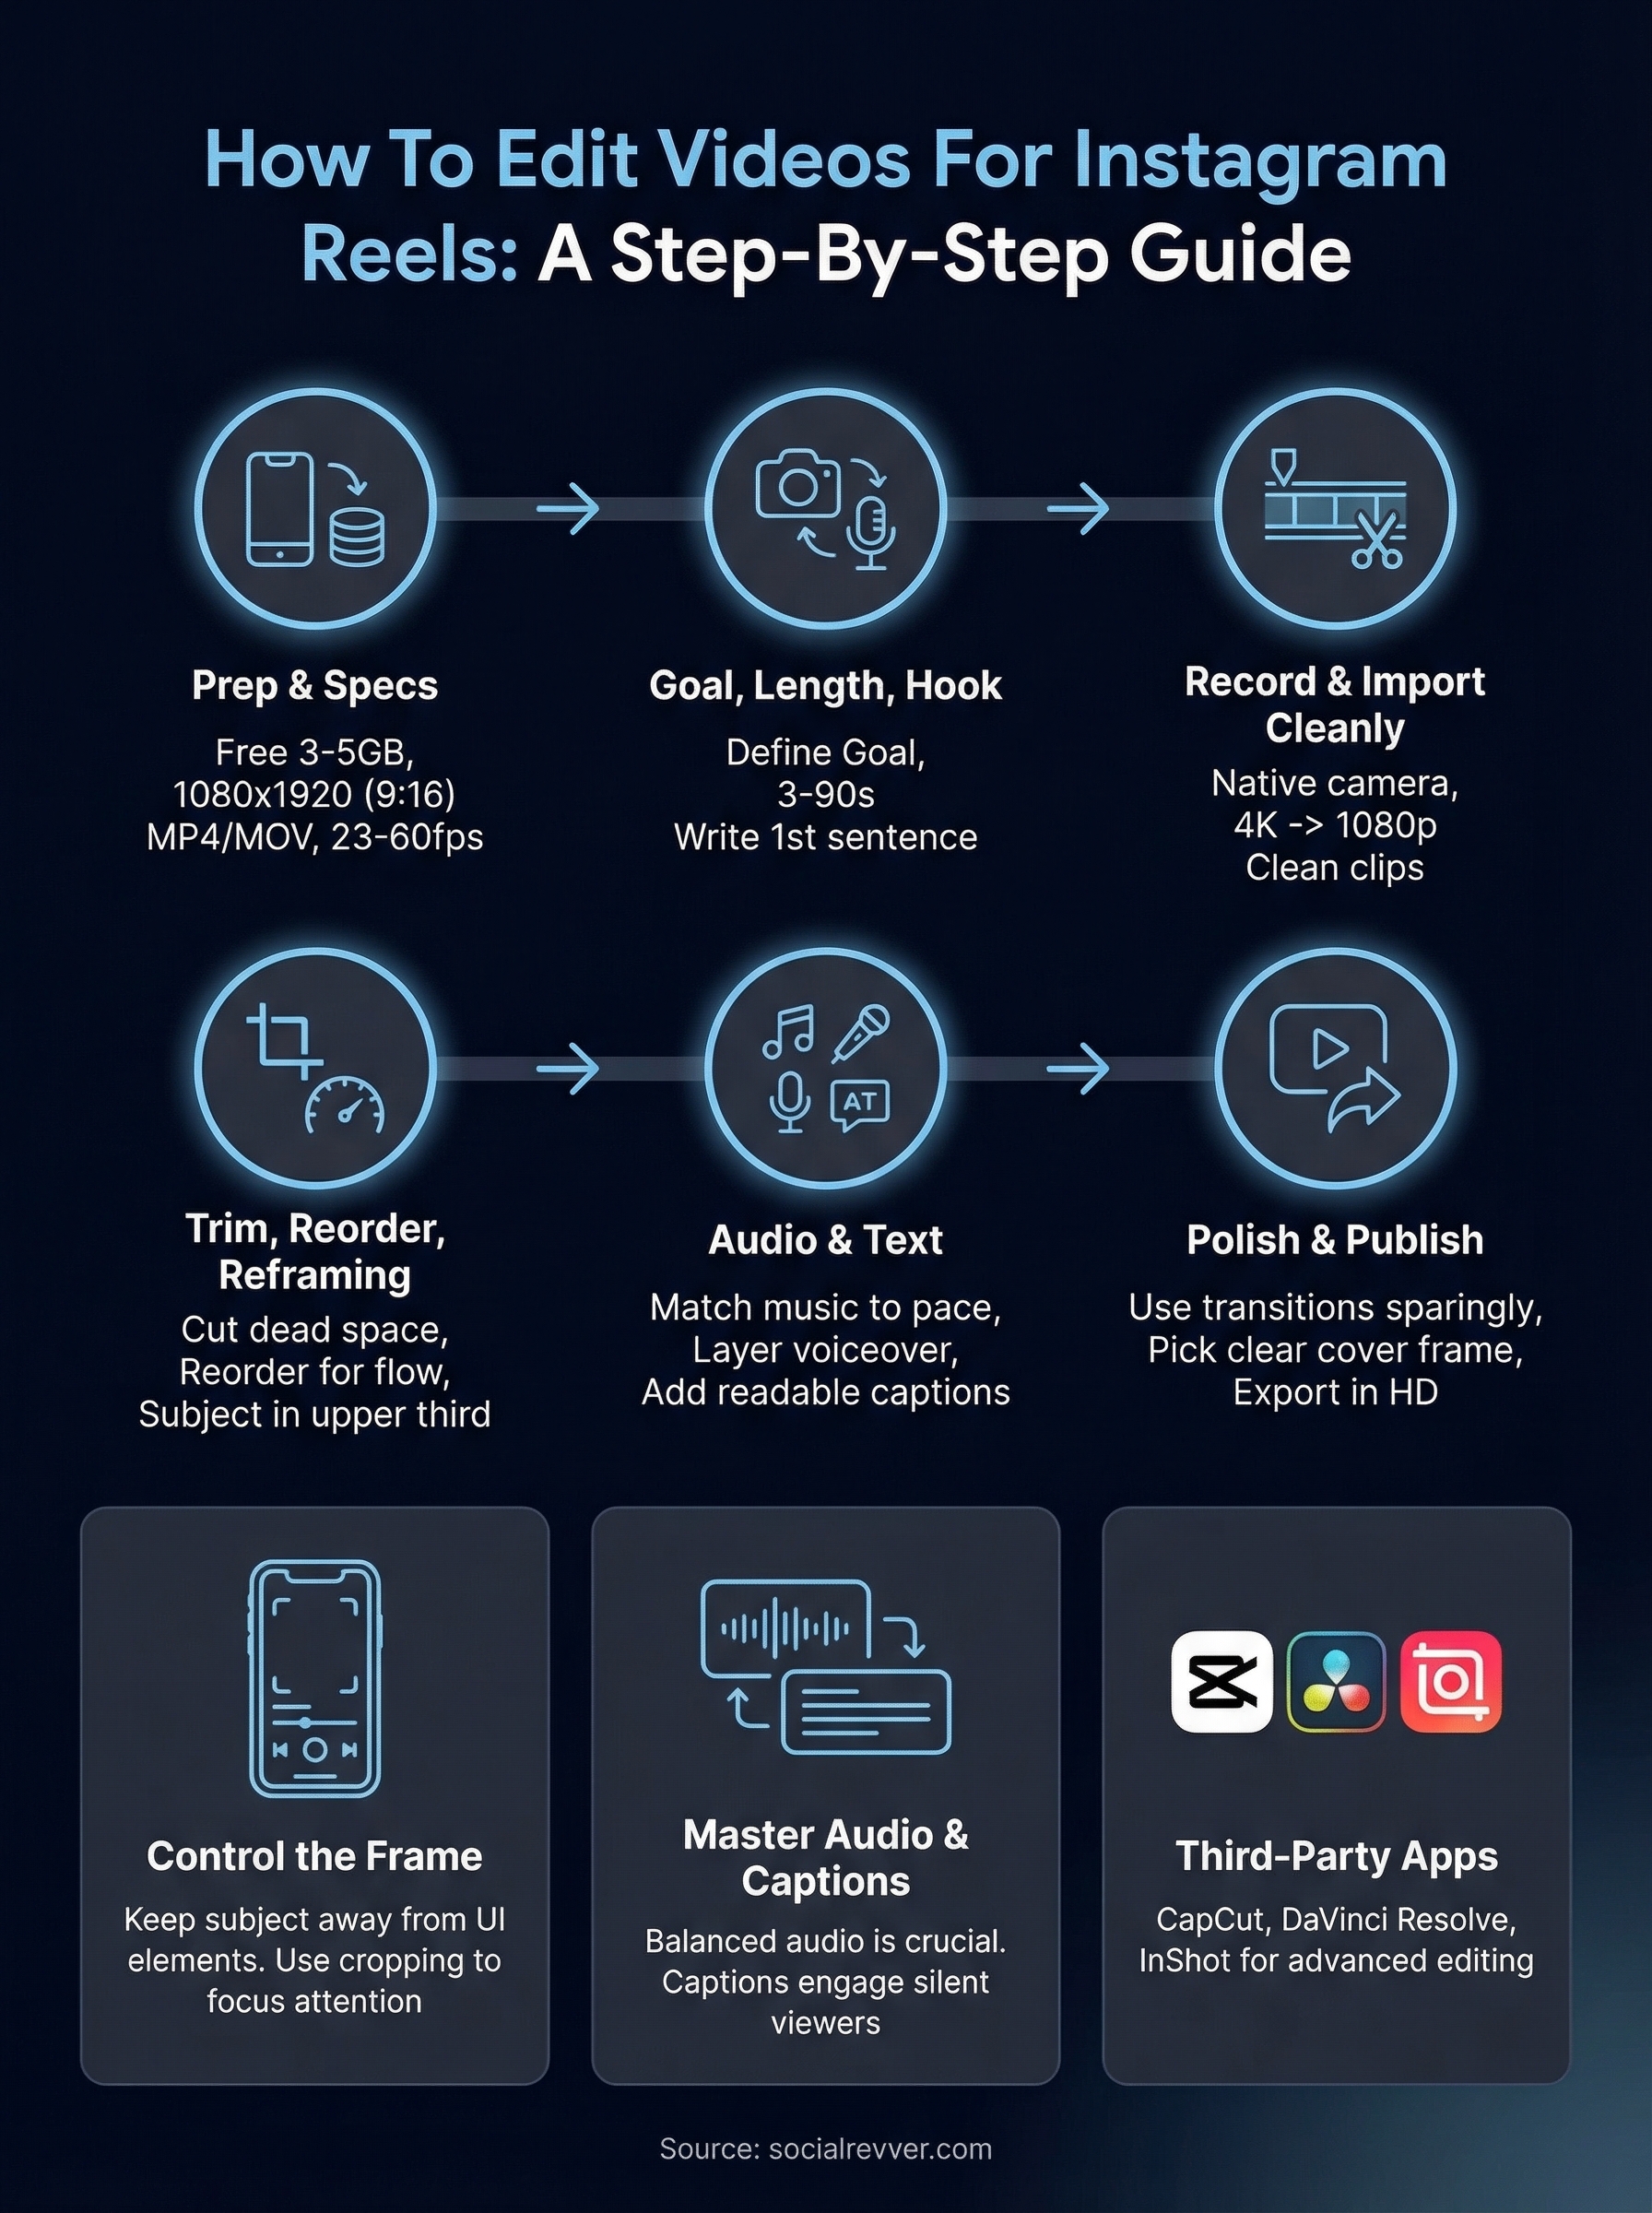
This guide walks you through the full editing process, step by step. You'll learn how to use Instagram's native editing tools, when to reach for third-party apps and desktop software, and how to apply editing techniques that actually move the needle on watch time and engagement. Whether you're editing your first Reel or your five-hundredth, this is the playbook to tighten up your process and make every cut count.
What you need before you edit a Reel
Before you learn how to edit videos for Instagram Reels, you need to make sure the basics are in place. Jumping into an edit without the right setup wastes time and produces worse results than you'd get with a little preparation. A few minutes of setup before you touch the timeline will save you from re-exporting, re-uploading, and wondering why your video looks blurry or out of sync on someone else's screen.
Your device and storage
Your phone or computer doesn't need to be the latest model, but storage space and processing power matter more than most people realize. Video files are large, and editing apps need room to cache previews, render effects, and store project files. Before you start, free up at least 3 to 5 GB of storage on your device to avoid crashes mid-edit or stuttering exports.
If you're editing on a phone, keep it charged or plug it in first. Rendering video drains power fast. For desktop editing, a modern processor and at least 8 GB of RAM will keep your timeline responsive without the lag that makes editing feel like a chore.
Instagram Reels technical specs
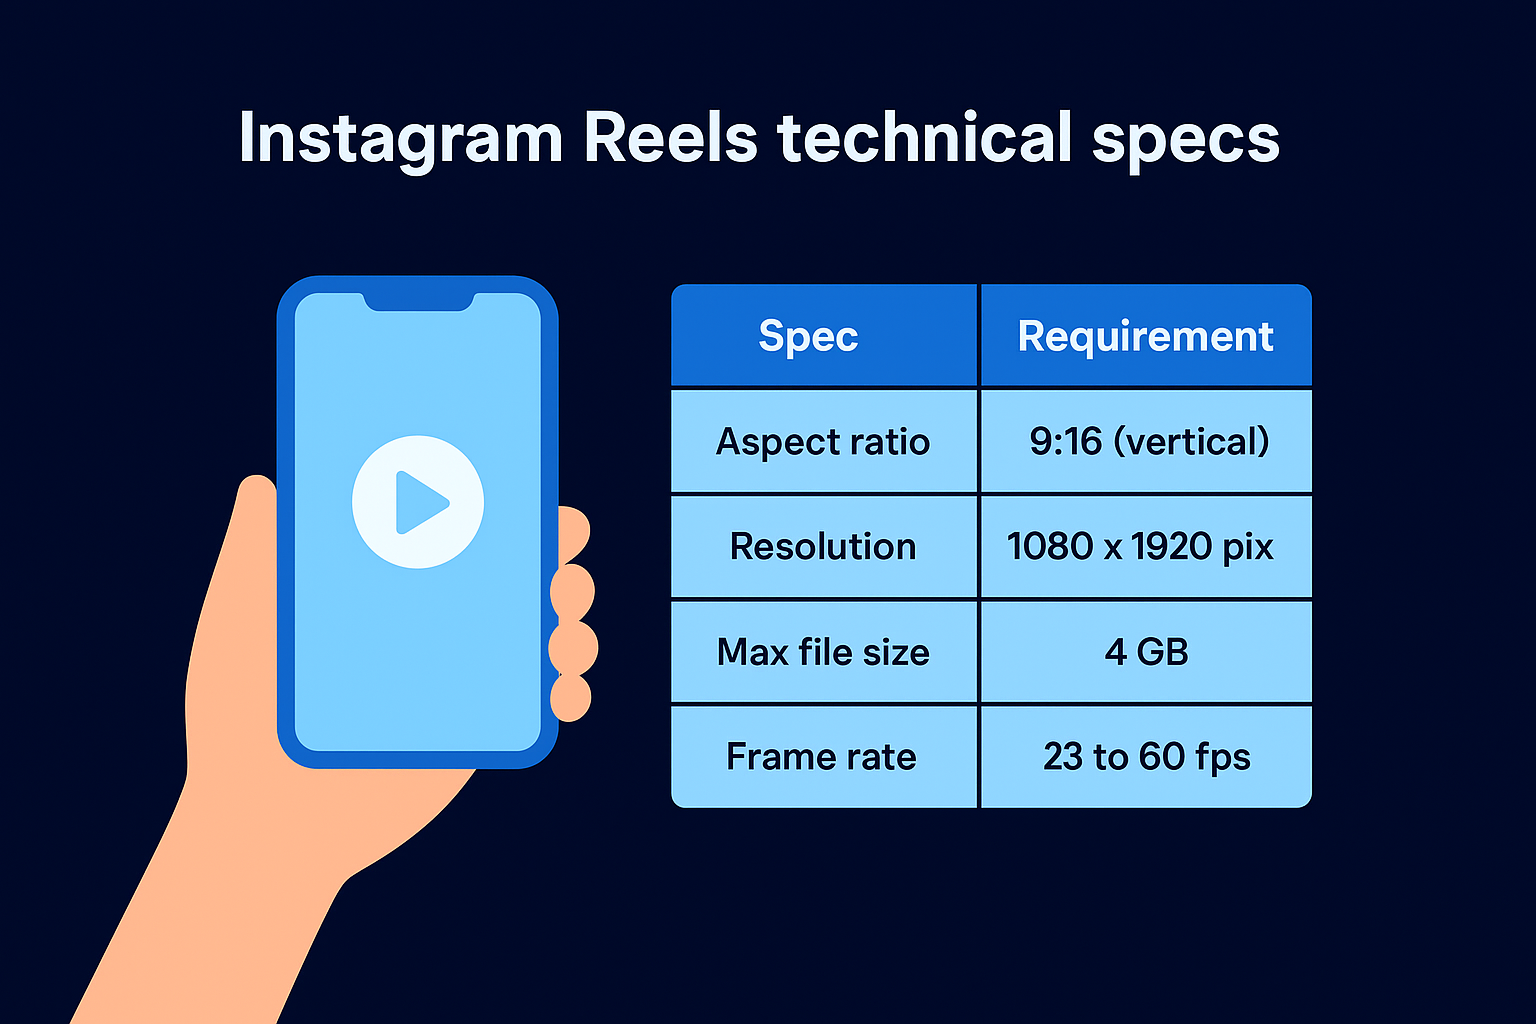
Instagram has firm technical requirements, and editing to the wrong specs means your video gets cropped or compressed in ways you didn't plan. Here are the key specs to keep in mind before you build a single frame:
| Spec | Requirement |
|---|---|
| Aspect ratio | 9:16 (vertical) |
| Resolution | 1080 x 1920 pixels |
| Max file size | 4 GB |
| Length | 3 seconds to 90 seconds |
| Frame rate | 23 to 60 fps |
| File format | MP4 or MOV |
Always set your project to 9:16 before importing footage. Cropping horizontal clips into a vertical frame after the fact almost always cuts out key visual elements and reduces perceived quality.
Setting your canvas to 1080 x 1920 at the start protects you from the most common mistake new Reel editors make. Your export settings should match those same specs so the file you upload doesn't get recompressed by Instagram more than necessary.
The raw footage you need ready
Gather all your clips before you open your editing app. Searching for footage mid-edit breaks your focus and drags out a session that should take 20 minutes into one that takes 90. Create a dedicated folder on your phone or desktop for the current Reel and move everything into it first, including any B-roll footage, screen recordings, photos, or graphics you plan to use.
Clip quality starts at the recording stage, not in the edit. If you're filming on a phone, shoot in the highest resolution your device supports and stick to strong natural light or a ring light to avoid grainy footage that no filter can fully fix. Poorly lit, shaky clips are harder to work with and harder for viewers to watch.
Apps to have installed before you start
Decide whether you're editing inside Instagram's native editor or using a third-party app before you sit down to work. Switching tools halfway through a project wastes significant time and sometimes means rebuilding your edit from scratch. If you plan to use a separate app, have it installed and updated before you start importing clips.
Also, check that your Instagram app is updated to the latest version. Instagram changes its in-app editing tools frequently, and older versions sometimes behave differently or lack newer features entirely. Working with a current version means you have access to the most complete set of native tools available when you need them.
Step 1. Pick a Reel goal, length, and hook
Before you open any editing app, you need three decisions locked in: what you want the Reel to do, how long it should run, and what the first line will be. When you know how to edit videos for Instagram Reels effectively, you know this step isn't optional. Skipping it means you'll make editing decisions without a clear target, and the finished video will reflect that confusion.
Define your goal before you cut anything
Your goal controls every creative decision downstream. A Reel built to generate inbound leads gets edited differently than one built to grow followers or explain a process. Without a clear goal, you end up optimizing for nothing in particular, which is why so many Reels get views but no results.
Pick one goal from this list before you do anything else:
- Drive profile visits and follows (brand awareness, new audience)
- Generate leads or DMs (direct response, offer-driven content)
- Build authority and trust (education, proof, behind-the-scenes)
- Promote a product or service (conversion-focused, clear call to action)
- Increase saves and shares (high-value tips, swipeable information)
One Reel, one goal. Trying to do all five in a single video produces content that serves no one well.
Match your length to your content type
Instagram allows Reels from 3 seconds to 90 seconds, but shorter usually outperforms longer unless your content earns the watch time. Use this as a starting guide:
| Content Type | Recommended Length |
|---|---|
| Quick tip or insight | 15 to 30 seconds |
| Tutorial or how-to | 30 to 60 seconds |
| Story or case study | 45 to 90 seconds |
| Product demonstration | 20 to 45 seconds |
Cut your Reel to the length the content actually needs, not the maximum Instagram allows.
Write your hook before you open the timeline
Your hook is the first 1 to 3 seconds of your Reel, and it determines whether anyone watches the rest. Write it out as a single sentence before you start editing, because the hook shapes how you arrange your clips, not the other way around.
Use this simple template: [Specific result or curiosity trigger] + [who it's for or why it matters]. For example: "Most people edit Reels backwards, and it's killing their watch time." That one line gives a viewer a reason to stay. Build your entire edit around delivering on whatever the hook promises.
Step 2. Record or import clips cleanly
Clean footage makes every other step in learning how to edit videos for Instagram Reels easier. Garbage in, garbage out applies here more than anywhere else in the process. If your clips are shaky, poorly lit, or recorded at the wrong resolution, no editing trick will fully compensate for the damage done at the recording stage. Decide before you shoot whether you're recording fresh clips or working with existing footage, because each path has its own set of decisions to get right.
Recording directly on your phone
When you record for a Reel, always shoot in your phone's native camera app, not inside Instagram's camera. Instagram's in-app camera compresses footage as you record, which reduces quality before you've even opened the editor. Your phone's native camera saves a full-resolution file that you can compress on your own terms during export.
Record at 4K if your phone supports it, then export at 1080p for Instagram. You'll have sharper footage to work with in the editor and more room to reframe or crop without losing visual quality.
A few non-negotiable recording habits that protect your edit:
- Lock your exposure and focus by tapping and holding on your subject before you hit record
- Film in portrait mode at 9:16 so you don't have to reframe later
- Use a tripod or stabilizer for any static talking-head clips to eliminate hand shake
- Record more than you think you need, at least 3 to 5 extra seconds on each end of every clip for editing room
Importing existing footage
If you're pulling clips from your camera roll, check the format and resolution before you import. Files shot on older devices or downloaded from other platforms sometimes come in at lower resolutions or incompatible frame rates, which can cause export issues or visual degradation later in the process.
Before you bring footage into your editor, run a quick audit of each clip:
- Resolution: Confirm each clip is at minimum 1080 x 1920 or can be cropped to fit
- Frame rate: Match your clips to a consistent frame rate, ideally 30 or 60 fps
- Orientation: Vertical clips drop straight into a 9:16 timeline without extra work
- Length: Flag any clips shorter than 2 seconds, they often cut too fast to read well on screen
Organizing everything into a single dedicated folder before you open your editing app keeps the import process fast and prevents your project files from getting mixed up with unrelated footage on your device.
Step 3. Trim, split, and reorder clips
Trimming, splitting, and reordering are the core mechanical skills you need when learning how to edit videos for Instagram Reels. Sloppy cuts, dead air at the start or end of a clip, and footage arranged in the wrong order will lose a viewer in the first five seconds. Getting these three operations right gives your edit a clean foundation to build everything else on top of.
Trim out dead space first
Every clip you recorded has extra footage at the beginning and end that serves no purpose in the final Reel. The pause before you started talking, the hesitation at the end, the moment your hand reached toward the camera to stop the recording. Your first job is to cut all of that out.
Trim to the exact frame where the action or speech starts. Viewers feel loose clips even when they can't explain why.
When trimming inside Instagram or any third-party app, drag the clip handles inward until only the usable content remains. Check both ends of every clip before you move on. A half-second of dead air at the start of your Reel is enough for most viewers to swipe away without giving your content a real chance.
Split clips to control rhythm
Splitting a clip lets you remove a section from the middle, cut out filler words, or shorten the pause between two sentences. Place your playhead at the exact frame where you want to cut and tap the split function. This is how you tighten a 60-second talking-head clip down to 35 seconds without losing any of the substance.
Use this workflow to split efficiently:
- Watch the full clip once and mark every pause or filler word
- Split just before and just after each section you want to remove
- Delete the unwanted segment and close the gap
- Play the joined section back to confirm the cut reads naturally and the audio doesn't jump
Reorder clips to match your hook
Once your clips are trimmed and split, arrange them in the order that serves your hook, not necessarily the order you originally recorded them. If you captured a strong result or reaction clip, move it earlier in the timeline to deliver on whatever your hook promised. Viewers need to feel clear forward momentum at every point in your Reel, and reordering is often the fastest way to create that pull.
Step 4. Crop, reframe, and control speed
When you're learning how to edit videos for Instagram Reels, cropping, reframing, and speed adjustments are the tools that let you control where a viewer's eyes land and how urgently the content feels. Most editors skip these entirely and publish footage that looks technically fine but feels flat. A few deliberate adjustments before you export will make a real difference in how polished and intentional your final Reel looks.
Crop and reframe for the vertical frame
Your clips should fill the 9:16 frame intentionally, not by accident. If your subject is off-center or too small in the frame, use the crop tool to reposition them closer to the upper third of the screen where the eye naturally lands first. Keep your subject away from the bottom 20% of the frame, since Instagram's UI elements like the like button, username, and caption text will cover that area on a viewer's screen.
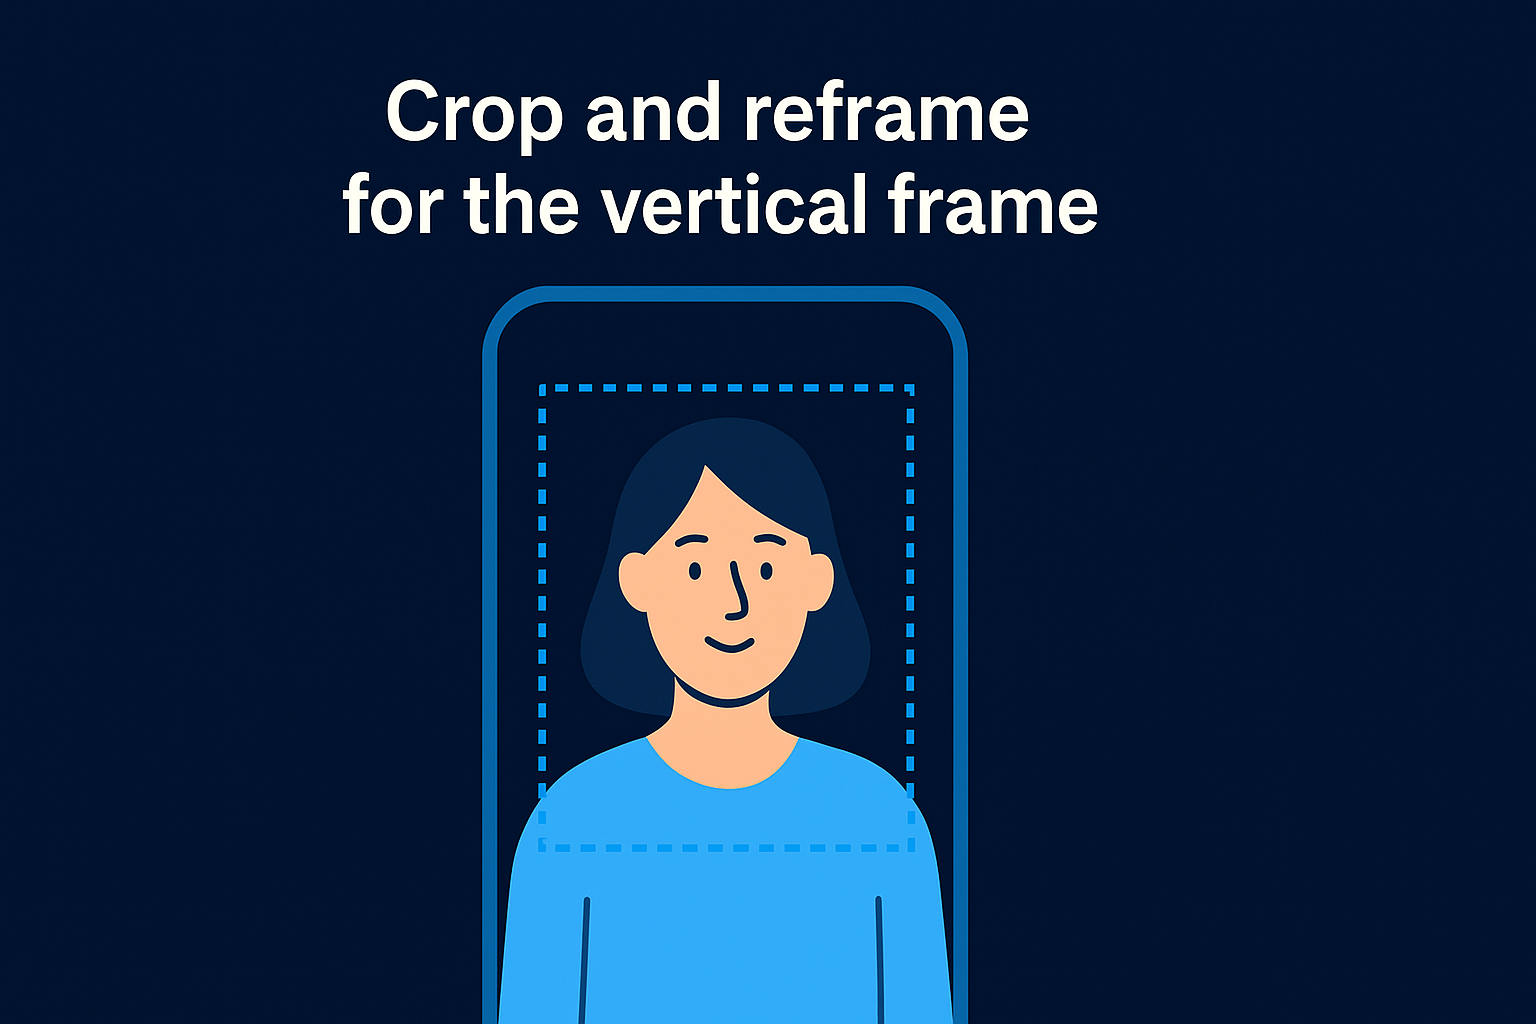
Reframe before you add any text overlays. If you move a clip after placing captions, your text layers will drift out of alignment and you'll need to reposition everything from scratch.
Use this checklist before you lock in your crop on each clip:
- Subject position: Eyes or face should sit in the upper third of the frame
- Margins: Keep at least 150 pixels of clearance from screen edges on all sides
- Zoom level: Crop no tighter than 80% of the original resolution to avoid visible pixelation
- Consistency: Match the framing across similar clips so the edit feels cohesive rather than jumpy
Use speed to shape attention
Speed changes are one of the most underused tools available in both Instagram's native editor and most third-party apps. A slight speed increase on a talking-head clip, typically around 1.1x to 1.2x, trims dead air between words without making the speaker sound unnatural. Your viewers rarely notice the adjustment consciously, but the clip feels tighter and more energized because of it.
Slow motion works in the opposite direction to create emphasis on a specific action or moment. If you're demonstrating a technique, cutting to 50% speed on the key frame draws attention exactly where you need it. Reserve slow motion for moments that genuinely earn the extra screen time. Overusing it makes your Reel feel padded rather than intentional, and that perception drives viewers toward the skip button faster than almost anything else in the edit.
Step 5. Add music, voiceover, and clean audio
Audio is the part of learning how to edit videos for Instagram Reels that most creators underestimate. Your viewers may forgive shaky footage or an imperfect cut, but bad audio will make them swipe away immediately. Before you publish, every audio element in your Reel needs a purpose and a clean mix.
Choose music that fits the pace
Instagram's built-in audio library gives you access to thousands of licensed tracks you can add directly inside the app without worrying about copyright restrictions. If you edit in a third-party app first, you need to add music inside Instagram after you import your finished clip, since third-party tracks often get muted on upload due to licensing detection.
Pick a track with a BPM that matches the energy of your content. A slow ballad under a fast-cut tutorial creates friction that viewers feel even if they can't name it.
When selecting a track, match the tempo to your edit rhythm rather than just picking whatever is trending. A track with a clear beat drop gives you a natural moment to cut to a new scene or reveal a result. Use that structure intentionally to make your transitions feel musical rather than mechanical.
Record and layer a voiceover
A voiceover gives your Reel a clear narrative thread without requiring you to appear on screen. Record in a quiet room with your phone 6 to 8 inches from your mouth to capture clean, consistent audio. Avoid recording near windows, fans, or air conditioning vents, since background noise bleeds into the track and is difficult to remove after recording.
Use this simple voiceover structure to keep your script tight:
- Hook line: One sentence that states the problem or the payoff
- Body: Two to four sentences of instruction or core insight
- Close: One sentence with a clear next action for the viewer
Clean up your audio levels
Balancing your audio levels is the final step before your Reel is ready to export. Your voiceover or on-camera speech should sit at the loudest point in the mix, with music running underneath at roughly 20 to 30% of the speech volume. Instagram normalizes audio on upload, so never peak your levels above 0dB in your editing app or you will get distortion in the final published version.
Watch the full Reel once with headphones before you export. What sounds balanced through your phone speaker often sounds uneven on a viewer's device, and catching that problem before upload costs you nothing.
Step 6. Add captions, text, and stickers that guide viewers
When you understand how to edit videos for Instagram Reels, you quickly learn that captions and text overlays are not decoration. They are functional tools that keep viewers watching, especially the 85% of people who scroll with their sound off. Every word you put on screen should either reinforce what you're saying or give a silent viewer enough context to follow along without the audio.
Use captions to capture silent viewers
Captions do the heavy lifting for muted playback, and adding them should be a non-negotiable step in your editing workflow. Instagram's native auto-caption tool generates captions automatically once you enable it inside the Reel editor. The accuracy is solid for clear speech, but you will need to review and correct the transcript before you publish since errors in captions look unprofessional and create confusion.
If you use a third-party app like CapCut, the auto-caption feature produces individual word highlights that pop on-screen in sync with your speech. Use the following text style settings as a starting baseline for readable captions:
| Setting | Recommended Value |
|---|---|
| Font | Bold, sans-serif |
| Font size | 48 to 56pt |
| Position | Center screen, lower third |
| Background | None or light shadow |
| Max words per line | 3 to 5 |
Place text where viewers actually look
On-screen text needs to sit in the safe zone of your frame, which runs from roughly 15% to 75% from the top of the screen. Anything below that gets covered by Instagram's UI buttons, and anything above that risks being cut off on certain devices. Keep your text away from the edges by at least 50 pixels on either side to maintain clean margins across different screen sizes.

Write your text overlays as short, punchy phrases rather than full sentences. Five words on screen land harder than fifteen.
Use text to amplify the key point at the exact moment you say it, not before and not after. If your voiceover says "this is the most important step," your text overlay should hit the screen on the word "important" to create emphasis rather than just redundancy.
Use stickers with intent
Instagram's sticker library includes polls, question boxes, and countdown timers, and each one serves a specific engagement function rather than just adding visual noise. A poll sticker on a Reel asking viewers to vote between two options creates an interaction that signals to the algorithm that your content drives engagement. Place stickers in the upper third of the frame so they sit above the UI layer and are easy to tap without blocking your subject.
Step 7. Polish pacing with effects, transitions, and b-roll
This step is where knowing how to edit videos for Instagram Reels starts to show in the final product. Pacing is the invisible force that keeps a viewer's attention locked in from the first cut to the last. If your Reel feels slow, choppy, or visually repetitive, this is the step that fixes it. Effects, transitions, and b-roll are your tools, but each one only works when you use it with a clear reason.
Use transitions to serve the cut, not fill it
Transitions exist to move a viewer between scenes without breaking their concentration. A simple hard cut is your default, and it works for the vast majority of Reel edits. Reach for a transition only when two clips have a significant visual difference that would feel jarring without a bridge between them.
The best transition in a Reel is one the viewer never consciously notices.
When you do use a transition, stick to two or three consistent styles throughout the entire Reel rather than mixing every effect available. A jump cut, a zoom transition, or a match cut each communicates a different relationship between clips. Jumping between a jump cut, a spin, a glitch effect, and a whip pan in the same 30-second Reel tells the viewer your edit has no point of view.
Layer b-roll to break visual repetition
B-roll is any supporting footage you cut to while your main audio continues to run underneath. A single talking-head clip held for more than five seconds loses viewers fast, and b-roll is the direct solution to that problem. Cut to a close-up of your hands, a relevant screen recording, a product shot, or an environment that matches the point you are making in the audio.
The practical rule is one visual change every two to three seconds during high-energy sections and every four to five seconds during slower, more deliberate ones. B-roll does not need to be elaborate to work. Even a simple cut to a different angle of the same subject resets the viewer's eye and adds enough visual variety to hold attention through the next sentence.
Apply effects with one job in mind
Every effect you add should perform a single function: emphasize, reveal, or transition. Text animations, zoom pulses, and flash cuts each draw attention to a specific moment. If you cannot explain in one sentence what a specific effect does for the viewer, remove it from the edit entirely.
Step 8. Choose a cover, write the caption, and publish in HD
This is the final step in learning how to edit videos for Instagram Reels, and it deserves as much attention as any cut you made in the timeline. Your cover image, caption, and export settings determine how your Reel appears in the feed, in search, and in the Reels tab before a single person presses play. Rush this step and you undermine every edit decision you made before it.
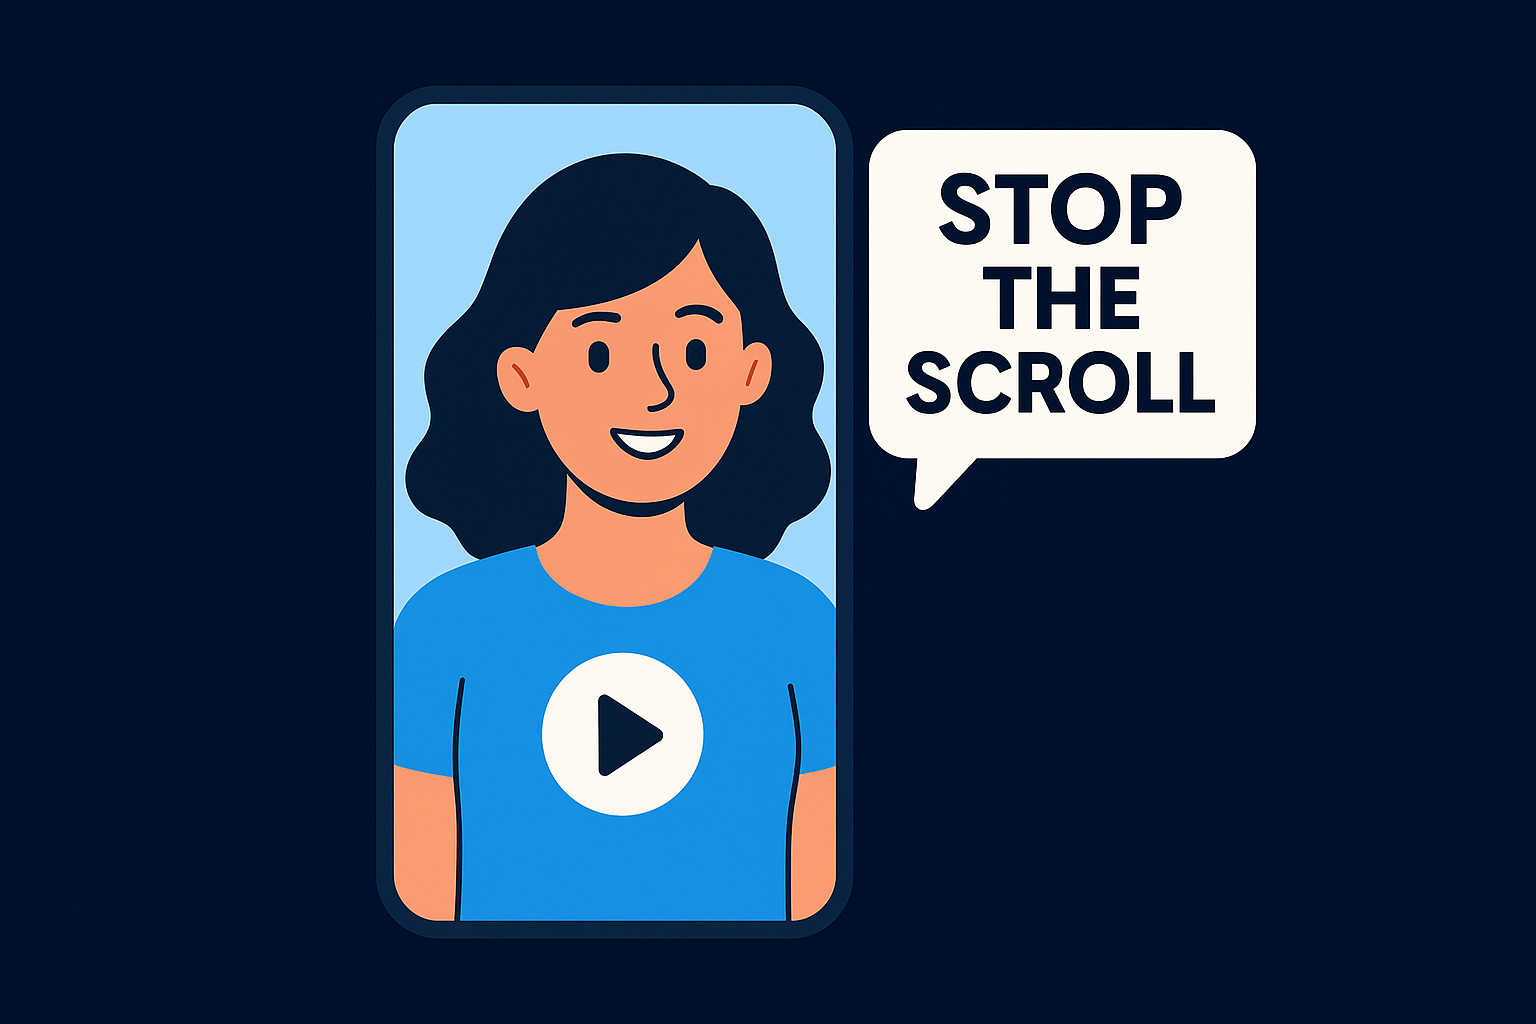
Pick a cover frame that stops the scroll
Your cover image is what appears on your profile grid and in the Reels browse tab, so it needs to communicate the value of the video in a single frame. Avoid selecting a blurry transition frame or a mid-blink shot. Instead, scroll through your Reel and pick the clearest, most visually compelling frame where your face or your main subject is in sharp focus and centered in the upper half of the screen.
If you want more control than Instagram's frame selector gives you, design a custom cover image on a 1080 x 1920 canvas and export it as a JPG before you upload. Keep any text on the cover large, bold, and limited to five words or fewer. Consistent cover styling across multiple Reels builds a recognizable visual identity on your profile grid that makes new visitors more likely to explore your content beyond the single video they landed on.
Write a caption that extends the Reel's reach
Your caption is not dead space below the video. Instagram's algorithm reads caption text as a relevance signal, and a well-written caption pulls in viewers who engage with the post directly. Write the first sentence as a standalone hook, since that is the only line visible before the "more" cutoff.
Lead with the most useful sentence you can write. Everything after it supports that line.
Use your caption to add context, ask a specific question, or direct viewers to their next step. Keep the total length between 100 and 150 words. Longer captions work for high-trust audiences, but for most Reels, tight and direct outperforms exhaustive every time.
Export and upload in HD
Before you hit publish, open your Instagram app, go to Settings, then Account, then Data Usage, and confirm that "Upload at Highest Quality" is enabled. Instagram compresses video by default on mobile connections, and turning that setting on is the single fastest fix for Reels that look sharp in your editing app but soft and degraded once they hit the feed.
Best apps to edit Reels outside Instagram
Instagram's native editor handles the basics well, but it gives you limited control over audio mixing, color grading, and advanced text animation. If you want tighter cuts, layered audio, or more precise control over every frame, you need a third-party app in your workflow. The tools below cover the full range of skill levels, from quick mobile edits to professional desktop finishing, and each one fills a specific gap that Instagram's built-in editor cannot.
CapCut
CapCut is the most widely used third-party app for learning how to edit videos for Instagram Reels on a mobile device. It gives you auto-captions, speed ramping, keyframe animation, and a full multi-track timeline, all inside a free app on iOS and Android. The auto-caption feature produces individual word highlights that sync accurately with speech, and the export settings let you control resolution and frame rate before you bring your file into Instagram.
Use this workflow inside CapCut to build and export a clean Reel:
- Import clips and set the canvas to 9:16 at 1080 x 1920
- Trim and split clips on the main timeline
- Add auto-captions and set the font to bold sans-serif
- Layer music at 20 to 30% volume below speech
- Export at 1080p, 30fps, then add licensed audio inside Instagram
DaVinci Resolve
DaVinci Resolve is the right choice when you need professional color correction, noise reduction, or multi-layer audio control and you edit on a desktop. The free version includes tools that compete directly with paid software at far higher price points, making it a strong option for creators who want maximum output quality without a monthly subscription.
Use DaVinci's Color page to normalize exposure across all clips before export. Consistent color grading across cuts makes a Reel look produced rather than assembled.
The main trade-off with DaVinci is the learning curve. Expect to spend time with the interface before your first project flows smoothly. The payoff is noticeably sharper output, especially for clips shot in low light or with inconsistent white balance across multiple takes.
InShot
InShot is the fastest option for quick mobile edits that don't require a full multi-track timeline. It handles trimming, caption overlays, music mixing, and aspect ratio formatting through a clean interface. If your Reel needs minor cuts and a text overlay rather than a full production build, InShot gets you from raw clips to exported file faster than any other tool in this list.
Your next Reel
You now have a complete, step-by-step system for how to edit videos for Instagram Reels, from setting up your specs before you touch the timeline to exporting in HD and writing a caption that earns reach. Every step in this guide builds on the one before it, so the fastest way to improve your results is to run through the full process on your next video rather than applying one or two tactics in isolation. Treat each Reel as a test, note what the data tells you, and tighten the edit on the next one.
Editing is a skill you sharpen by doing. The gap between a Reel that scrolls past and one that builds your business comes down to how deliberately you approach each cut, each audio decision, and each frame you put in front of your audience. If you want a proven system built around you, get your free social media strategy and see exactly what a data-driven content engine looks like in practice.