
Every piece of short-form content that stops your scroll was built inside an editing timeline. Whether you're a founder building a personal brand or a creator scaling your audience, understanding video editing basics provides a critical advantage, even if you never plan to edit footage yourself.
This guide covers everything a beginner needs to complete their first project: the fundamental concepts that drive good editing, software recommendations for every budget level, and the essential techniques for trimming, splitting, and organizing your workflow. No expensive gear or years of experience required.
At SocialRevver, we build and operate complete content systems for founders and creators who need to stay focused on running their business. But understanding how editing actually works helps you evaluate production quality and communicate clearly with any team handling your content. Think of this as your complete foundation for video editing, whether you're doing it yourself or simply want to know what separates amateur clips from professional-grade content.
What video editing is and how it works
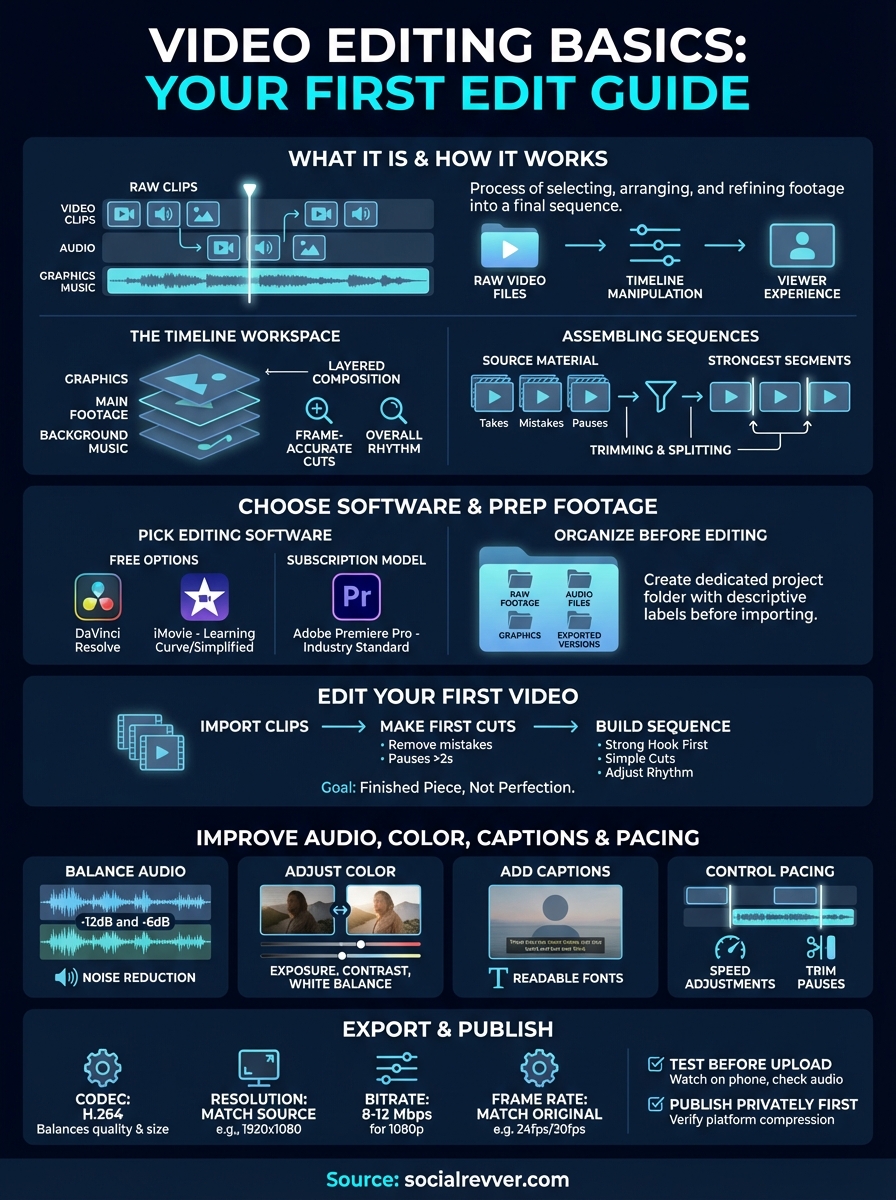
Video editing is the process of selecting, arranging, and refining recorded footage into a final sequence that serves a specific purpose. You take raw video files from your camera or phone and manipulate them inside software to control what your viewer sees, when they see it, and how long each moment lasts. Every decision you make, from cutting out dead air to adjusting color saturation, shapes the viewer's experience and determines whether they stay engaged or scroll past.
The timeline is your workspace
The timeline functions as your primary interface for building video content. You drag video clips, audio files, and graphic elements onto horizontal tracks that represent different layers of your project, with the playhead moving left to right to show you exactly what plays at each second. This visual representation lets you see the entire structure of your video at once, making it simple to spot pacing issues, gaps in content, or moments that run too long.

Each track in your timeline stacks on top of the others, creating a layered composition where graphics can sit above your main footage and background music runs beneath your voice. You can zoom in to make frame-accurate cuts or zoom out to view the overall rhythm and flow of your piece. The timeline gives you complete control over duration, sequence order, and the relationship between visual and audio elements.
How editors assemble sequences from raw clips
Editing transforms disconnected footage into a coherent story by removing unwanted sections and connecting the best moments. You start with source material that might include multiple takes, mistakes, long pauses, and content you don't need in the final product. Your job involves identifying the strongest segments, cutting out everything else, and arranging what remains in an order that makes sense to your audience.
The process relies on two fundamental actions: trimming and splitting. Trimming shortens a clip by adjusting its start or end point, while splitting cuts a single clip into separate pieces so you can delete portions or rearrange sections. These simple operations form the foundation of video editing basics, and you'll use them constantly throughout every project you create.
The best edits are invisible because viewers focus on the content rather than noticing when cuts happen.
What editing actually controls
Beyond basic arrangement, editing gives you authority over multiple technical and creative elements that determine your video's final quality. You adjust audio levels to balance dialogue against music, apply color correction to fix exposure problems, and add text overlays or graphics to emphasize key information. Each layer of control lets you refine the viewer experience and create content that matches professional standards.
Speed adjustments let you slow down important moments or speed through less critical sections, while transitions determine how one clip connects to the next. You also control the export settings that determine file size, resolution, and compatibility with different platforms. Understanding these controls separates raw footage from polished content that actually serves your business goals.
Choose software and prep your footage the right way
Your software choice and file organization system determine whether your first project flows smoothly or turns into a frustrating technical mess. You don't need expensive professional tools to learn video editing basics, but you do need software that matches your current skill level and a logical system for managing your footage before you start cutting. Making smart decisions at this stage saves hours of confusion later.
Pick editing software that matches your experience level
Free options like DaVinci Resolve give you professional-grade features without upfront costs, making them perfect for beginners who want to learn serious editing techniques. The software includes everything you need for cutting, color grading, and audio mixing, though the learning curve can feel steep during your first few projects. iMovie ships free with Mac computers and offers a simplified interface that helps complete beginners finish their first edit in under an hour.
If you're working on Windows without budget constraints, Adobe Premiere Pro remains the industry standard with extensive tutorials available online. The subscription model means you pay monthly rather than buying software outright, which works well if you're testing whether video editing fits your workflow. Your choice matters less than consistent practice with whichever tool you select.
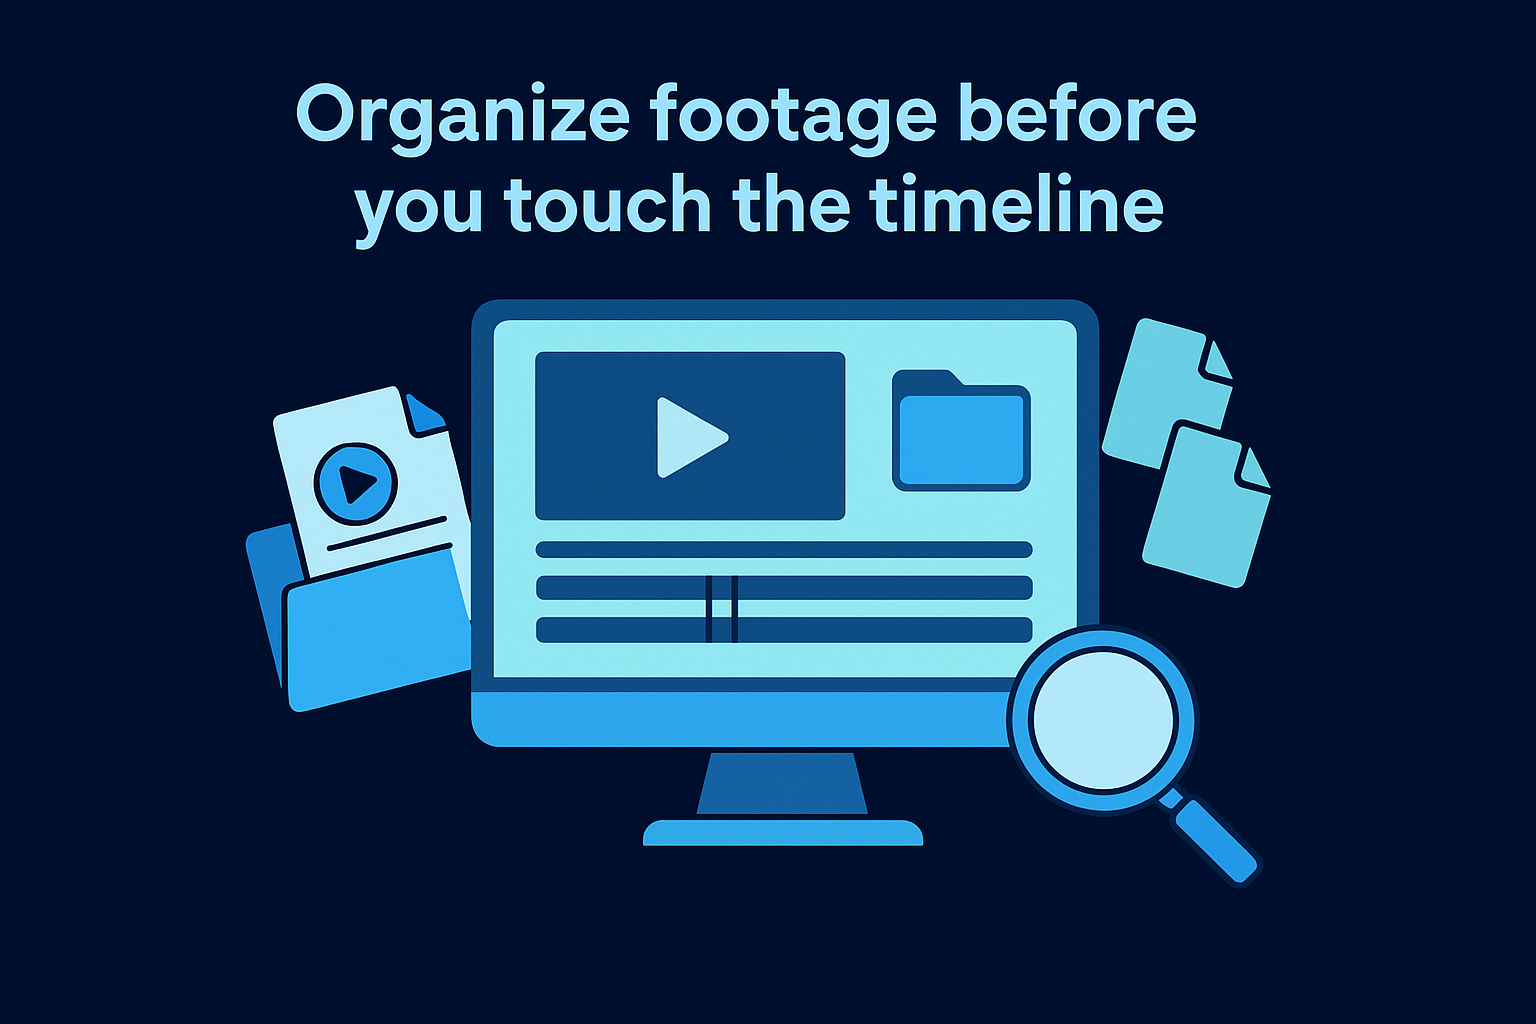
Organize footage before you touch the timeline
Create a dedicated project folder on your computer with separate subfolders for raw footage, audio files, graphics, and exported versions. This structure prevents the common beginner mistake of losing track of source files or accidentally deleting footage you still need. Name your video files with descriptive labels that indicate what each clip contains rather than relying on generic camera-generated names like "IMG_0047.mov."
Import all your footage into your editing software before you start cutting anything. Review each clip quickly to identify which takes you want to use and which contain mistakes or unusable content. Many editors add markers or ratings during this review stage to flag their best material, turning the actual editing process into assembly work rather than constant searching.
Organization before editing cuts your project time in half and eliminates technical problems that kill momentum.
Edit your first video from start to finish
Your first complete edit teaches you more about video editing basics than any tutorial because you experience how each decision affects the final result. Start with a simple project like a 30-second introduction or a quick product demonstration rather than attempting a complex five-minute piece. Working through the entire workflow from import to export builds confidence and reveals which techniques require more practice.
Import clips and make your first cuts
Drag your organized footage into the timeline and watch it play through without making any edits. This initial viewing helps you identify natural stopping points, mistakes that need removal, and sections that drag on too long. You'll spot moments where you paused to think, looked away from the camera, or repeated yourself multiple times.
Select the razor tool or use your keyboard shortcut (usually "C" or "Ctrl+K") to split clips at specific points where you want to make changes. Cut out obvious mistakes first, then remove pauses longer than two seconds that slow your pacing. Each cut you make should serve a clear purpose, whether that's eliminating dead air, fixing an error, or removing content that doesn't support your main message.
Build your sequence with transitions and timing
Arrange your best clips in an order that makes logical sense to someone watching without context. Your opening three seconds determine whether viewers stay or leave, so place your strongest hook at the very beginning rather than building up to it gradually. Position supporting points in the middle and end with a clear call to action or conclusion.
Add simple cuts between clips rather than fancy transitions for your first project. Straight cuts keep viewer attention on your content instead of drawing focus to editing choices, and they prevent your video from looking dated or amateur. Adjust the length of each clip by dragging its end point left or right until the overall rhythm feels natural when you play through the complete sequence.
The goal of your first edit is completing a finished piece, not achieving perfection.
Watch your assembled sequence at least three times before moving forward. You'll notice pacing problems and awkward moments that weren't obvious during the cutting process.
Improve audio, color, captions, and pacing
Basic cuts create structure, but audio quality, visual consistency, and text overlays transform rough footage into professional content that holds attention. These refinements separate amateur videos from polished pieces that viewers actually watch through to the end. Mastering these video editing basics elevates your content quality without requiring advanced technical skills or expensive equipment.
Balance audio levels and remove background noise
Your audio track determines whether viewers stay or leave within the first five seconds. Open your audio mixer panel and identify clips where dialogue sounds too quiet compared to music or background noise. Adjust volume levels so your voice sits between -12dB and -6dB on the meter, loud enough to hear clearly but with headroom to prevent distortion or clipping.
Most editing software includes a noise reduction filter that removes constant hum from air conditioning, computer fans, or street traffic. Apply this effect sparingly because aggressive settings create an artificial underwater sound that distracts viewers. Test your adjustments by playing sections with headphones at normal listening volume rather than relying on your computer speakers.
Adjust color and exposure for visual consistency
Clips shot in different lighting conditions create a jarring viewing experience when placed next to each other in your timeline. Access your software's color correction panel and adjust exposure, contrast, and white balance until adjacent clips match visually. Start with the auto-balance function, then make manual adjustments to fix any remaining inconsistencies.
Consistent color grading signals professional production value even when viewers don't consciously notice the improvement.
Increase contrast slightly to make your footage look less flat, but avoid pushing saturation too high unless you want a stylized look. Your goal involves creating visual consistency rather than achieving a specific aesthetic during your first projects.
Add captions and control pacing
Captions increase watch time because 85% of social media video plays without sound. Use your software's text tool to add subtitles that appear on screen as you speak, positioning them in the lower third of your frame where they don't cover important visual elements. Choose simple fonts like Arial or Helvetica that remain readable on mobile screens.
Play through your complete edit and identify sections that drag or move too quickly. Speed up boring segments by 10-20% or trim additional pauses to improve momentum. Your video should maintain consistent energy from start to finish without exhausting viewers.
Export and publish without losing quality
Your export settings determine whether your finished video maintains the visual clarity and audio fidelity you worked to achieve during editing. Incorrect choices at this stage compress your footage into a pixelated mess or create files too large to upload anywhere. Understanding these final video editing basics ensures your content reaches viewers exactly as you intended without technical problems that undermine your production quality.
Choose export settings that match your platform
Select H.264 as your codec because it balances quality with file size, making it compatible with every major platform from Instagram to YouTube. Set your resolution to match your source footage rather than upscaling lower quality clips, using 1920x1080 for standard HD or 3840x2160 if you shot in 4K. Higher resolutions create unnecessarily large files unless your target platform supports them and your audience watches on devices that display the difference.
Configure your bitrate between 8-12 Mbps for 1080p content to maintain quality while keeping upload times reasonable. Variable bitrate (VBR) produces smaller files than constant bitrate (CBR) by allocating more data to complex scenes and less to simple ones. Frame rate should match your original footage, typically 24fps for cinematic content or 30fps for standard video.
Export settings directly impact viewer experience because poor compression creates artifacts and blur that make your content look unprofessional.
Test your export before uploading
Watch your exported file completely before publishing to catch rendering errors or compression problems that weren't visible in your editing timeline. Play the video on your phone to confirm text remains readable and colors display correctly on smaller screens. Check that audio levels sound balanced through phone speakers rather than just headphones, since most viewers watch social content this way.
Upload your video as an unlisted or private post first to verify the platform didn't apply additional compression that degrades quality. Some platforms like Instagram reduce bitrate significantly, requiring you to adjust your export settings and re-upload if quality drops too much during processing.
Next steps
You now understand the complete workflow for video editing basics, from organizing source files through export settings that preserve quality. Your next project should focus on speed and completion rather than perfection, building muscle memory for the core techniques you learned here. Practice trimming clips, adjusting audio levels, and adding captions across three to five short videos before attempting anything more complex or time-intensive.
The fastest path to professional-grade content involves treating editing as a system rather than a creative experiment. Most founders and business owners realize they don't have time to manage production consistently while running daily operations. If you need a predictable content engine that converts attention into revenue without handling production yourself, apply to work with our team and receive a free 40+ slide social media strategy. We build and operate the entire system while you stay focused on running your business.